Tag Archives: nft

Algorand NFTs With IPFS Assets

As of this writing, the overall cryptocurrency sector is undergoing a major downturn in which about two-third of the average blockchain’s market cap has evaporated since early April. This might not be the best time to try make anyone excited about launching NFTs on any blockchain. Nevertheless, volatility of cryptocurrencies has always been a known phenomenon. From a technological perspective, it’s much less of a concern than how well-designed the underlying blockchain is in terms of security, decentralization and scalability.

Many popular blockchain platforms out there are offering their own open-standard crypto tokens, but so far the most prominent crypto tokens, fungible or non-fungible, are Ethereum-based. For instance, the NFTs we minted on Avalanche‘s Fuji testnet in a previous blog post are Ethereum-based and ERC-721 compliant.

Given Ethereum’s large market share, dApp developers generally prefer having their NFTs transacting on Ethereum main chain or Ethereum-compatible chains like Polygon and Avalanche’s C-Chain, yet many others opt to pick incompatible chains as their NFT development/trading platforms.

Choosing a blockchain for NFT development

Use cases of NFT are mostly about provenance of authenticity. To ensure that the NFT related transactions to be verifiable at any point of time, the perpetual availability of the blockchain in which the transaction history reside is critical. Though not often, hard forks do happen, consequently rendering historical transactions forking off the main chain. That’s highly undesirable. Some blockchains such as Algorand and Polkadot tout that their chains are by-design “forkless”, which does provide an edge over competitors.

Another factor critical for transacting NFTs on a blockchain is low latency in consensually finalizing transactions. That latency is generally referred to as finality. Given that auctions are commonly time-sensitive events for trading of NFTs, a long delay is obviously ill-suited. Chains like Avalanche and Algorand are able to keep the finality under 5 seconds which is much shorter compared to 10+ minutes required on other blockchains like Cardano or Ethereum.

Algorand and IPFS

Launched 3 years ago in June 2019, Algorand is a layer-1 blockchain with a focus on being highly decentralized, scalable and secured with low transaction cost. Its low latency (i.e. finality) along with a design emphasis in running the blockchain with a forkless operational model makes it an appealing chain for transacting and securing NFTs.

In this blog post, we’re going to create a simple dApp in JavaScript to mint a NFT on the Algorand Testnet for a digital asset pinned to IPFS. IPFS, short for InterPlanetary File System, is a decentralized peer-to-peer network aimed to serve as a single resilient global network for storing and sharing files.

Algorand NFT

Algorand comes with its standard asset class, ASA (Algorand Standard Assets), which can be used for representing a variety of customizable digital assets. A typical NFT can be defined configuratively as an ASA by assigning asset parameters with values that conform to Algorand’s NFT specifications.

The two common Algorand specs for NFTs are ARC-3 and ARC-69. A main difference between the two specs is that ARC-69 asset data is kept on-chain whereas ARC-3’s isn’t. We’ll be minting an ARC-3 NFT with the digital asset stored on IPFS.

Contrary to the previous NFT development exercise on Avalanche that leverages a rich-UI stack (i.e. Scaffold-ETH), this is going to be a barebone proof-of-concept with core focus on how to programmatically create a NFT for a digital asset (an digital image) pinned to IPFS. No web frontend UI.

Algorand SDKs

Algorand offers SDKs for a few programming languages including JavaScript, Python, Go and Java. We’ll be using the JavaScript SDK. The official developer website provides tutorials for various dApp use cases and one of them is exactly about launching ARC-3 NFT for assets on IPFS. Unfortunately, even though the tutorial is only about 6 months old it no longer works due to some of its code already being obsolete.

It’s apparently a result of the rapidly evolving SDK code — a frustrating but common problem for developers to have to constantly play catch-up game with backward incompatible APIs evolving at a breakneck pace. For example, retrieval of user-level information is no longer supported by the latest Algorand SDK client (algod client), but no where could I find any tutorials doing it otherwise. Presumably for scalability, it turns out such queries are now delegated to an Algorand indexer which runs as an independent process backed by a PostgreSQL compatible database.

Given the doubt of the demo code on the Algorand website being out of date, I find it more straight forward (though a little tedious) to pick up the how-to’s by directly digging into the SDK source code js-algorand-sdk. For instance, one could quickly skim through the method signature and implementation logic of algod client method pendingTransactionInformation from the corresponding source or indexer method lookupAccountByID from indexer’s source for their exact tech specs.

Create a NPM project with dependencies

Minimal requirements for this Algorand NFT development exercise include the following:

  • Node.js installed with NPM
  • An account at Pinata, an IPFS pinning service
  • An Algorand compatible crypto wallet (Pera is preferred for the availability of a “developer” mode)

First, create a subdirectory as the project root. For example:

$ mkdir ~/algorand/algo-nft-ipfs/
$ cd ~/algorand/algo-nft-ipfs/

Next, create dependency file package.json with content like below:

{
    "name": "algo-nft-ipfs",
    "version": "1.0.0",
    "description": "Algorand NFT with asset pinned to IPFS",
    "scripts": {
        "mint": "node algo-nft-ipfs.js"
    },
    "dependencies": {
        "@algonaut/algo-validation-agent": "latest",
        "@pinata/sdk": "latest",
        "algosdk": "latest",
        "bs58": "latest",
        "dotenv": "latest",
        "ipfs-core": "latest",
        "ipfs-http-client": "latest",
        "node-base64-image": "latest"
    },
    "devDependencies": {
        "nodemon": "latest",
        "parcel-bundler": "latest"
    },
    "keywords": []
}

Install the NPM package:

$ npm install

Create file “.env” for keeping private keys

Besides the SDKs for Pinata and Algorand, dotenv is also included in the package.json dependency file, allowing variables such as NFT recipient’s wallet mnemonic, algod client/indexer URLs (for Algorand Testnet) and Pinata API keys, to be kept in file .env in the filesystem.

mnemonic = ""
algodClientUrl = "https://node.testnet.algoexplorerapi.io"
algodClientPort = ""
algodClientToken = ""
indexerUrl = "https://algoindexer.testnet.algoexplorerapi.io"
indexerPort = ""
indexerToken = ""
pinataApiKey = ""
pinataApiSecret = ""

Note that Algorand uses a 25-word mnemonic with the 25th word derived from the checksum out of selected words within the 24-word BIP39-compliant mnemonic. Many blockchains simply use 12-word BIP39 mnemonics.

ARC-3 NFT metadata

Next, we create file assetMetadata.js for storing algorand ARC-3 specific metadata:

module.exports = {
    arc3MetadataJson: {
        "name": "",
        "description": "",
        "image": "ipfs://",
        "image_integrity": "sha256-",
        "image_mimetype": "",
        "external_url": "",
        "external_url_integrity": "",
        "external_url_mimetype": "",
        "animation_url": "",
        "animation_url_integrity": "sha256-",
        "animation_url_mimetype": "",
        "properties": {
            "file_url": "",
            "file_url_integrity": "",
            "file_url_mimetype": "",
        }
    }
}

Main application logic

The main function createNft does a few things:

  • Create an account object from the wallet mnemonic stored in file .env
  • Create an digital asset (an image) pinned to IPFS
  • Create an ARC-3 compliant NFT associated with the pinned asset

const createNft = async () => {
  try {
    let account = createAccount();

    console.log("Press any key when the account is funded ...");
    await keypress();

    const asset = await createAssetOnIpfs();

    const { assetID } = await createArc3Asset(asset, account);
  }
  catch (err) {
    console.log("err", err);
  };

  process.exit();
};

Account object creation

Function createAccount is self explanatory. It retrieves the wallet mnemonic from file .env, derives from it the secret key and wallet address (public key) and display a reminder to make sure the account is funded with Algorand Testnet tokens as fees for transactions.

const createAccount = () => {
  try {
    const mnemonic = process.env.mnemonic
    const account = algosdk.mnemonicToSecretKey(mnemonic);

    console.log("Derived account address = " + account.addr);
    console.log("To add funds to the account, visit https://dispenser.testnet.aws.algodev.network/?account=" + account.addr);

    return account;
  }
  catch (err) {
    console.log("err", err);
  }
};

Pinning a digital asset to IPFS

Function createAssetOnIpfs is responsible for creating and pinning a digital asset to IPFS. This is where the asset attributes including source file path, description, MIME type (e.g. image/png, video/mp4) will be provided. In this example a ninja smiley JPEG under the project root is being used as a placeholder. Simply substitute it with your favorite image, video, etc.

const createAssetOnIpfs = async () => {
  return await pinata.testAuthentication().then((res) => {
    console.log('Pinata test authentication: ', res);
    return assetPinnedToIpfs(
      'smiley-ninja-896x896.jpg',
      'image/jpeg',
      'Ninja Smiley',
      'Ninja Smiley 896x896 JPEG image pinned to IPFS'
    );
  }).catch((err) => {
    return console.log(err);
  });
}

The actual pinning work is performed by function assetPinnedToIpfs which returns identifying IPFS URL for the digital asset’s metadata.

const assetPinnedToIpfs = async (nftFilePath, mimeType, assetName, assetDesc) => {
  const nftFile = fs.createReadStream(nftFilePath);
  ...

  const pinMeta = {
    pinataMetadata: {
      name: assetName,
      ...
    },
    pinataOptions: {
      cidVersion: 0
    }
  };

  const resultFile = await pinata.pinFileToIPFS(nftFile, pinMeta);

  let metadata = assetMetadata.arc3MetadataJson;

  const integrity = ipfsHash(resultFile.IpfsHash);

  metadata.name = `${assetName}@arc3`;
  metadata.description = assetDesc;
  metadata.image = `ipfs://${resultFile.IpfsHash}`;
  metadata.image_integrity = `${integrity.cidBase64}`;
  metadata.image_mimetype = mimeType;
  metadata.properties = ...
  ...

  const resultMeta = await pinata.pinJSONToIPFS(metadata, pinMeta);
  const metaIntegrity = ipfsHash(resultMeta.IpfsHash);

  return {
    name: `${assetName}@arc3`,
    url: `ipfs://${resultMeta.IpfsHash}`,
    metadata: metaIntegrity.cidUint8Arr,
    integrity: metaIntegrity.cidBase64
  };
};

Creating an Alogrand ARC-3 NFT

Function createNft is just an interfacing wrapper of the createArc3Asset function that does the actual work of initiating and signing the transactions on the Algorand Testnet for creating the ARC-3 NFT associated with the pinned asset using algod client.

const createArc3Asset = async (asset, account) => {
  (async () => {
    let acct = await indexerClient.lookupAccountByID(account.addr).do();
    console.log("Account Address: " + acct['account']['address']);
    ...
  })().catch(e => {
    console.error(e);
    console.trace();
  });

  const txParams = await algodClient.getTransactionParams().do();

  const txn = algosdk.makeAssetCreateTxnWithSuggestedParamsFromObject({
    from: account.addr,
    total: 1,
    decimals: 0,
    ...
    unitName: 'nft',
    assetName: asset.name,
    assetURL: asset.url,
    assetMetadataHash: new Uint8Array(asset.metadata),
    suggestedParams: txParams
  });

  const rawSignedTxn = txn.signTxn(account.sk);
  const tx = await algodClient.sendRawTransaction(rawSignedTxn).do();

  const confirmedTxn = await waitForConfirmation(tx.txId);
  const txInfo = await algodClient.pendingTransactionInformation(tx.txId).do();

  const assetID = txInfo["asset-index"];

  console.log('Account ', account.addr, ' has created ARC3 compliant NFT with asset ID', assetID);
  console.log(`Check it out at https://testnet.algoexplorer.io/asset/${assetID}`);

  return { assetID };
}

Note that element values total:1 and decimals:0 are for ensuring uniqueness of the NFT. Also worth noting is that Algorand SDK provides a waitForConfirmation() function for awaiting transaction confirmation for a specified number of rounds:

const confirmedTxn = await algosdk.waitForConfirmation(algodClient, txId, waitRounds);

However, for some unknown reason, it doesn’t seem to work with a fixed waitRounds, thus a custom function seen in a demo app on Algorand’s website is being used instead. The custom code simply verifies returned value from algod client method pendingTransactionInformation(txId) in a loop.

Putting everything together

For simplicity, the above code logic is all put in a single JavaScript script algo-nft-ipfs.js under the project root.

const fs = require('fs');
const path = require('path');
const algosdk = require('algosdk');
const bs58 = require('bs58');

require('dotenv').config()
const assetMetadata = require('./assetMetadata');

const algodClient = new algosdk.Algodv2(
  process.env.algodClientToken,
  process.env.algodClientUrl,
  process.env.algodClientPort
);

const indexerClient = new algosdk.Indexer(
  process.env.indexerToken,
  process.env.indexerUrl,
  process.env.indexerPort
);

const pinataApiKey = process.env.pinataApiKey;
const pinataApiSecret = process.env.pinataApiSecret;
const pinataSdk = require('@pinata/sdk');
const pinata = pinataSdk(pinataApiKey, pinataApiSecret);

const keypress = async () => {
  process.stdin.setRawMode(true);
  return new Promise(resolve => process.stdin.once('data', () => {
    process.stdin.setRawMode(false)
    resolve()
  }));
};

const waitForConfirmation = async (txId) => {
  const status = await algodClient.status().do();
  let lastRound = status["last-round"];
  let txInfo = null;

  while (true) {
    txInfo = await algodClient.pendingTransactionInformation(txId).do();
    if (txInfo["confirmed-round"] !== null && txInfo["confirmed-round"] > 0) {
      console.log("Transaction " + txId + " confirmed in round " + txInfo["confirmed-round"]);
      break;
    }
    lastRound ++;
    await algodClient.statusAfterBlock(lastRound).do();
  }

  return txInfo;
}

const createAccount = () => {
  try {
    const mnemonic = process.env.mnemonic
    const account = algosdk.mnemonicToSecretKey(mnemonic);

    console.log("Derived account address = " + account.addr);
    console.log("To add funds to the account, visit https://dispenser.testnet.aws.algodev.network/?account=" + account.addr);

    return account;
  }
  catch (err) {
    console.log("err", err);
  }
};

const ipfsHash = (cid) => {
  const cidUint8Arr = bs58.decode(cid).slice(2);
  const cidBase64 = cidUint8Arr.toString('base64');
  return { cidUint8Arr, cidBase64 };
};

const assetPinnedToIpfs = async (nftFilePath, mimeType, assetName, assetDesc) => {
  const nftFile = fs.createReadStream(nftFilePath);
  const nftFileName = nftFilePath.split('/').pop();
  
  const properties = {
    "file_url": nftFileName,
    "file_url_integrity": "",
    "file_url_mimetype": mimeType
  };

  const pinMeta = {
    pinataMetadata: {
      name: assetName,
      keyvalues: {
        "url": nftFileName,
        "mimetype": mimeType
      }
    },
    pinataOptions: {
      cidVersion: 0
    }
  };

  const resultFile = await pinata.pinFileToIPFS(nftFile, pinMeta);
  console.log('Asset pinned to IPFS via Pinata: ', resultFile);

  let metadata = assetMetadata.arc3MetadataJson;

  const integrity = ipfsHash(resultFile.IpfsHash);

  metadata.name = `${assetName}@arc3`;
  metadata.description = assetDesc;
  metadata.image = `ipfs://${resultFile.IpfsHash}`;
  metadata.image_integrity = `${integrity.cidBase64}`;
  metadata.image_mimetype = mimeType;
  metadata.properties = properties;
  metadata.properties.file_url = `https://ipfs.io/ipfs/${resultFile.IpfsHash}`;
  metadata.properties.file_url_integrity = `${integrity.cidBase64}`;

  console.log('Algorand NFT-IPFS metadata: ', metadata);

  const resultMeta = await pinata.pinJSONToIPFS(metadata, pinMeta);
  const metaIntegrity = ipfsHash(resultMeta.IpfsHash);
  console.log('Asset metadata pinned to IPFS via Pinata: ', resultMeta);

  return {
    name: `${assetName}@arc3`,
    url: `ipfs://${resultMeta.IpfsHash}`,
    metadata: metaIntegrity.cidUint8Arr,
    integrity: metaIntegrity.cidBase64
  };
};

const createAssetOnIpfs = async () => {
  return await pinata.testAuthentication().then((res) => {
    console.log('Pinata test authentication: ', res);
    return assetPinnedToIpfs(
      'smiley-ninja-896x896.jpg',
      'image/jpeg',
      'Ninja Smiley',
      'Ninja Smiley 896x896 JPEG image pinned to IPFS'
    );
  }).catch((err) => {
    return console.log(err);
  });
}

const createArc3Asset = async (asset, account) => {
  (async () => {
    let acct = await indexerClient.lookupAccountByID(account.addr).do();
    console.log("Account Address: " + acct['account']['address']);
    console.log("         Amount: " + acct['account']['amount']);
    console.log("        Rewards: " + acct['account']['rewards']);
    console.log(" Created Assets: " + acct['account']['total-created-assets']);
    console.log("  Current Round: " + acct['current-round']);
  })().catch(e => {
    console.error(e);
    console.trace();
  });

  const txParams = await algodClient.getTransactionParams().do();

  const txn = algosdk.makeAssetCreateTxnWithSuggestedParamsFromObject({
    from: account.addr,
    total: 1,
    decimals: 0,
    defaultFrozen: false,
    manager: account.addr,
    reserve: undefined,
    freeze: undefined,
    clawback: undefined,
    unitName: 'nft',
    assetName: asset.name,
    assetURL: asset.url,
    assetMetadataHash: new Uint8Array(asset.metadata),
    suggestedParams: txParams
  });

  const rawSignedTxn = txn.signTxn(account.sk);
  const tx = await algodClient.sendRawTransaction(rawSignedTxn).do();

  // const confirmedTxn = await algosdk.waitForConfirmation(algodClient, tx, 4);
  // /* Error: Transaction not confirmed after 4 rounds */
  const confirmedTxn = await waitForConfirmation(tx.txId);
  const txInfo = await algodClient.pendingTransactionInformation(tx.txId).do();

  const assetID = txInfo["asset-index"];

  console.log('Account ', account.addr, ' has created ARC3 compliant NFT with asset ID', assetID);
  console.log(`Check it out at https://testnet.algoexplorer.io/asset/${assetID}`);

  return { assetID };
}

const createNft = async () => {
  try {
    let account = createAccount();

    console.log("Press any key when the account is funded ...");
    await keypress();

    const asset = await createAssetOnIpfs();

    const { assetID } = await createArc3Asset(asset, account);
  }
  catch (err) {
    console.log("err", err);
  };

  process.exit();
};

createNft();

Minting the Algorand NFT

To mint the ARC-3 compliant NFT:

$ npm run mint

Upon successful minting of the NFT, you’ll see messages similar to the following with a reminder for where to look up for details about the NFT and its associated transactions on the Algorand Testnet:

Account  has created ARC3 compliant NFT with asset ID: 
Check it out at https://testnet.algoexplorer.io/asset/

Verifying …

From the algoexplorer.io website, the URL of the IPFS metadata file for the NFT should look like below:

ipfs://

Value should match the hash value of the pinned asset metadata file under your Pinata account and should be viewable at:

https://gateway.pinata.cloud/ipfs/

There are a few Algorand compatible wallets with Pera being the one created by the Algorand’s development team. For developers, Pera has a convenient option for switching between the Algorand Mainnet and Testnet. To verify the receipt of the NFT, simply switch to Algorand Testnet (under Settings > Developer Settings > Node Settings).

Here’s what the received NFT in a Pera wallet would look like:
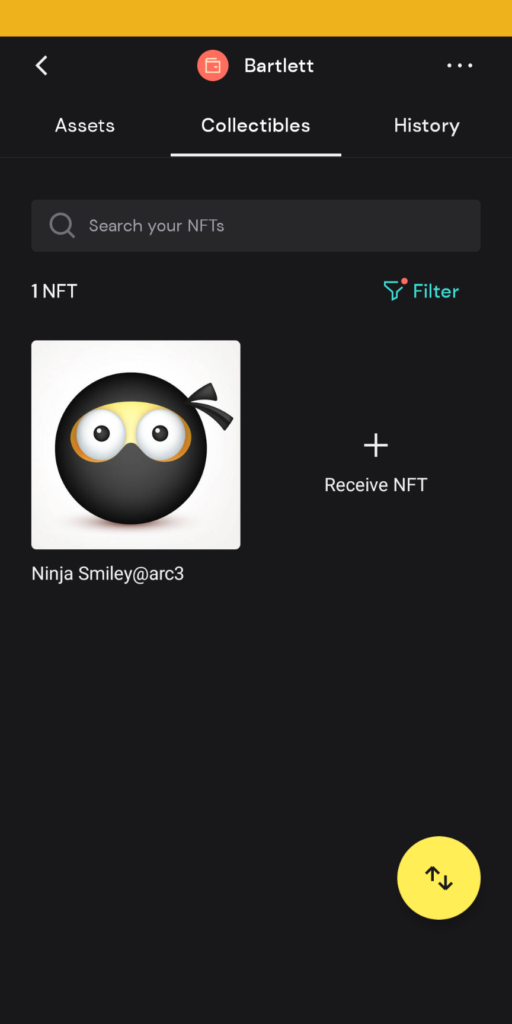
Pera - Ninja Smiley ARC3 NFT

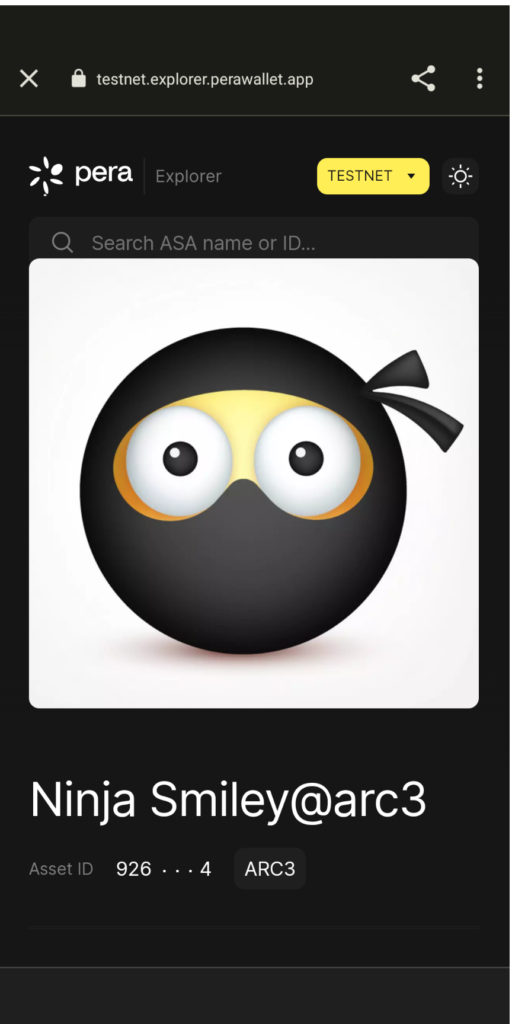
From within Pera Explorer:

Pera Explorer - Ninja Smiley ARC3

Ethereum-compatible NFT On Avalanche

While blockchain has been steadily gaining increasing attention from the general public over the past couple of years, it’s NFT, short for non-fungible token, that has recently taken the center stage. In particular, NFT shines in the area of provenance of authenticity. By programmatically binding a given asset to a unique digital token referencing immutable associated transactions on a blockchain, the NFT essentially serves as the “digital receipt” of the asset.

Currently Ethereum is undergoing a major upgrade to cope with future growth of the blockchain platform which has been suffering from low transaction rate and high gas fee due to the existing unscalable Proof of Work consensus algorithm. As described in a previous blockchain overview blog post, off-chain solutions including bridging the Ethereum main chain with layer-2 subchains such as Polygon help circumvent the performance issue.

Avalanche

Some layer-1 blockchains support Ethereum’s NFT standards (e.g. ERC-721, ERC-1155) in addition to providing their own native NFT specs. Among them is Avalanche which has been steadily growing its market share (in terms of TVL), trailing behind only a couple of prominent layer-1 blockchains such as Solana and Cardano.

With separation of concerns (SoC) being one of the underlying design principles, Avalanche uses a subnet model in which validators on the subnet only operate on the specific blockchains of their interest Also in line with the SoC design principle, Avalanche comes with 3 built-in blockchains each of which serves specific purposes with its own set of API:

  • Exchange Chain (X-Chain) – for creation & exchange of digital smart assets (including its native token AVAX) which are bound to programmatic governance rules
  • Platform Chain (P-Chain) – for creating & tracking subnets, each comprising a dynamic group of stake holders responsible for consensually validating blockchains of interest
  • Contract Chain (C-Chain) – for developing smart contract applications

NFT on Avalanche

Avalanche allows creation of native NFTs as a kind of its smart digital assets. Its website provides tutorials for creating such NFTs using its Go-based AvalancheGo API. But perhaps its support of the Ethereum-compatible NFT standards with much higher transaction rate and lower cost than the existing Ethereum mainnet is what helps popularize the platform.

In this blog post, we’re going to create on the Avalanche platform ERC-721 compliant NFTs which require programmatic implementation of their sale/transfer terms in smart contracts. C-Chain is therefore the targeted blockchain. And rather than deploying our NFTs on the Avalanche mainnet, we’ll use the Avalanche Fuji Testnet which allows developers to pay for transactions in test-only AVAX tokens freely available from some designated crypto faucet.

Scaffold-ETH: an Ethereum development stack

A code repository of comprehensive Ethereum-based blockchain computing functions, Scaffold-ETH, offers a suite of tech stacks best for fast prototyping development along with sample code for various use cases of decentralized applications. The stacks include Solidity, Hardhat, Ether.js and ReactJS.

The following softwares are required for installing Scaffold-ETH, building and deploying NFT smart contracts:

Launching NFTs on Avalanche using a customized Scaffold-ETH

For the impatient, the revised code repo is at this GitHub link. Key changes made to the original branch in Scaffold-ETH will be highlighted at the bottom of this post.

To get a copy of Scaffold-ETH repurposed for NFTs on Avalanche, first git-clone the repo:

git clone https://github.com/oel/avalanche-scaffold-eth-nft avax-scaffold-eth-nft

Next, open up a couple of shell command terminals and navigate to the project-root (e.g. avax-scaffold-eth-nft).

Step 1: From the 1st shell terminal, install the necessary dependent modules.

cd avax-scaffold-eth-nft/
yarn install

Step 2: From the 2nd terminal, specify an account as the deployer.

Choose an account that owns some AVAX tokens (otherwise, get free tokens from an AVAX faucet) on the Avalanche Fuji testnet and create file packages/hardhat/mnemonic.txt with the account’s 12-word mnemonic in it.

cd avax-scaffold-eth-nft/
yarn account
yarn deploy --network fujiAvalanche

For future references, the “deployed at” smart contract address should be saved. Transactions oriented around the smart contract can be reviewed at snowtrace.io.

Step 3: Back to the 1st terminal, start the Node.js server at port# 3000.

yarn start

This will spawn a web page on the default browser (which should have been installed with the MetaMask extension).

Step 4: From the web browser, connect to the MetaMask account which will receive the NFTs

Step 5: Back to the 2nd terminal, mint the NFTs.

yarn mint --network fujiAvalanche

The address of the NFT recipient account connected to the browser app will be prompted. Upon successful minting, images of the NFTs should be automatically displayed on the web page.

To transfer any of the NFTs to another account, enter the address of the account to be transferred to and click “transfer”. Note that the account connected to the browser app would need to own some AVAX tokens (again if not, get free tokens from an AVAX faucet).

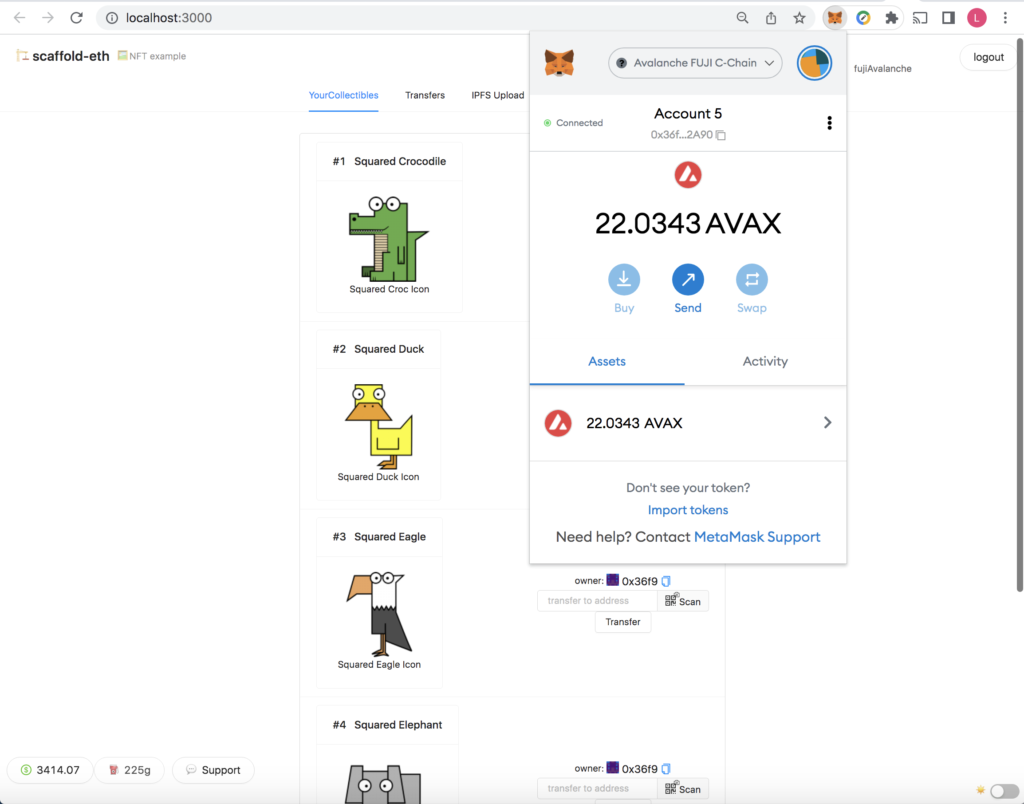
The web page upon successful minting should look like below:

Avalanche NFTs using Scaffold-ETH (MetaMask connected)

Key changes made to the original Scaffold-ETH branch

It should be noted that Scaffold-ETH is a popular code repo under active development. The branch I had experimented with a few months ago is already markedly different from the same branch I git-cloned for custom modification. That prompted me to clone a separate repo to serve as a “snapshot” of the branch, rather than just showing my modifications to an evolving code base.

Below are the main changes made to the Scaffold-ETH Simple NFT Example branch git-cloned on March 30:

Hardhat configuration script: packages/hardhat/hardhat.config.js

The defaultNetwork value in the original Hardhat configuration script is “localhost” by default, assuming a local instance of a selected blockchain is in place. The following change sets the default network to the Fuji testnet, whose network configuration parameters need to be added as shown below.

const defaultNetwork = "fujiAvalanche";
# const defaultNetwork = "mainnetAvalanche";
...
module.exports = {
  ...
  networks: {
    ...
    fujiAvalanche: {
      url: "https://api.avax-test.network/ext/bc/C/rpc",
      gasPrice: 225000000000,
      chainId: 43113,
      accounts: {
        mnemonic: mnemonic(),
      },
    },
    ...

Note that with the explicit defaultNetwork value set to “fujiAvalanche”, one could skip the --network fujiAvalanche command line option in the smart contract deploy and mint commands.

ReactJS main app: packages/react-app/src/App.jsx

To avoid compilation error, the following imports need to be moved up above the variable declaration section in main Node.js app.

import { useContractConfig } from "./hooks"
import Portis from "@portis/web3";
import Fortmatic from "fortmatic";
import Authereum from "authereum";

...
const targetNetwork = NETWORKS.fujiAvalanche;
# const targetNetwork = NETWORKS.mainnetAvalanche

Minting script: packages/hardhat/scripts/mint.js

A few notes:

  • The square-shaped animal icon images for the NFTs used in the minting script are from public domain sources. Here’s the link to the author’s website.
  • Node module prompt-sync is being used (thus is also added to the main package.json dependency list). It’s to avoid having to hardcode the NFT recipient address in the minting script.
  • The code below makes variable toAddress a dynamic input value and replaces the original NFT images with the square-styling images along with a modularized mintItem function.
...
const prompt = require('prompt-sync')();

const delayMS = 5000  // Increase delay as needed!

const main = async () => {

  // ADDRESS TO MINT TO:
  // const toAddress = "0x36f90A958f94F77c26614DB170a5C8a7DF062A90"
  const toAddress = prompt("Enter the address to mint to: ");

  console.log("\n\n 🎫 Minting to "+toAddress+"...\n");

  const { deployer } = await getNamedAccounts();
  const yourCollectible = await ethers.getContract("YourCollectible", deployer);

  // Item #1

  const iconCrocodile = {
    "description": "Squared Croc Icon",
    "external_url": "https://blog.genuine.com/",
    "image": "https://blog.genuine.com/wp-content/uploads/2022/03/Crocodile-icon.png",
    "name": "Squared Crocodile",
    "attributes": [
       {
         "trait_type": "Color",
         "value": "Green"
       }
    ]
  }
  mintItem(iconCrocodile, yourCollectible, toAddress)

  await sleep(delayMS)

  // Item #2

  const iconDuck = {
    "description": "Squared Duck Icon",
    "external_url": "https://blog.genuine.com/",
    "image": "https://blog.genuine.com/wp-content/uploads/2022/03/Duck-icon.png",
    "name": "Squared Duck",
    "attributes": [
       {
         "trait_type": "Color",
         "value": "Yellow"
       }
    ]
  }
  mintItem(iconDuck, yourCollectible, toAddress)

  await sleep(delayMS)

  // Item #3

  const iconEagle = {
    "description": "Squared Eagle Icon",
    "external_url": "https://blog.genuine.com/",
    "image": "https://blog.genuine.com/wp-content/uploads/2022/03/Eagle-icon.png",
    "name": "Squared Eagle",
    "attributes": [
       {
         "trait_type": "Color",
         "value": "Dark Gray"
       }
    ]
  }
  mintItem(iconEagle, yourCollectible, toAddress)

  await sleep(delayMS)

  // Item #4

  const iconElephant = {
    "description": "Squared Elephant Icon",
    "external_url": "https://blog.genuine.com/",
    "image": "https://blog.genuine.com/wp-content/uploads/2022/03/Elephant-icon.png",
    "name": "Squared Elephant",
    "attributes": [
       {
         "trait_type": "Color",
         "value": "Light Gray"
       }
    ]
  }
  mintItem(iconElephant, yourCollectible, toAddress)

  await sleep(delayMS)

  // Item #5

  const iconFish = {
    "description": "Squared Fish Icon",
    "external_url": "https://blog.genuine.com/",
    "image": "https://blog.genuine.com/wp-content/uploads/2022/03/Fish-icon.png",
    "name": "Squared Fish",
    "attributes": [
       {
         "trait_type": "Color",
         "value": "Blue"
       }
    ]
  }
  mintItem(iconFish, yourCollectible, toAddress)

  await sleep(delayMS)

  console.log("Transferring Ownership of YourCollectible to "+toAddress+"...")

  await yourCollectible.transferOwnership(toAddress, { gasLimit: 8000000 });  // Increase limit as needed!

  await sleep(delayMS)

  ...
}

async function mintItem(item, contract, mintTo, limit = 8000000) {  // Increase limit as needed!
  console.log("Uploading `%s` ...", item.name)
  const uploaded = await ipfs.add(JSON.stringify(item))

  console.log("Minting `%s` with IPFS hash ("+uploaded.path+") ...", item.name)
  await contract.mintItem(mintTo,uploaded.path,{gasLimit:limit})
}
...

A Brief Overview Of Blockchains

It’s early 2022, and blockchain has amassed more attention than ever. Initially emerged in the form of a cryptocurrency, followed by the rising of additional ones operating on open-source development platforms, and further catalyzed by a frenzy of NFT, the word “blockchain” has effectively evolved from a geek keyword into a household term.

While a majority of the public is still skeptical about the legitimacy of the blockchain phenomenon, apparently many bystanders are beginning to be bombarded by a mix of curiosity and a feeling of being left out, especially with the recent NFT mania.

It should be noted that by “blockchains”, I’m generally referring to public permissionless blockchains for brevity.

Permissionless vs permissioned

Most of the blockchains commonly heard of, such as Bitcoin, Ethereum, Cardano, are permissionless blockchains which anyone can anonymously participate. Many of these blockchains are open-source. On the other hand, permissioned blockchains from products like Hyperledger Fabric require permissions and proof of identity (e.g. KYC/AML) from their operators for participation.

From a programming enthusiast’s perspective, there is some interesting technological aspect in blockchain that warrants a deep dive. Rather than only authoring smart contracts at the user-application layer, exploring how a blockchain’s participating nodes competing to grow a decentralized immutable ledger via a consensus algorithm will give one a full picture of its technological merit. That’s one of the motivations for me to develop a proof-of-concept crypto-mining blockchain system back in 2020.

Last I surveyed the blockchain landscape, the choice for a development platform was simple. That was about 3 years ago. Excluding permissioned-only blockchains, the only platform ready for “big time” development back then was Ethereum with scripting language Solidity and framework Truffle for smart contracts. By “big time”, I mean ready for the average programming enthusiasts to participate the ecosystem through available tech docs and self-learning. Much has evolved since.

Trending blockchain development platforms

There is now a big list of open-source blockchains besides Bitcoin and Ethereum — Solana, Cardano, Polkadot, Avalanche, Polygon, Algorand, Tezos, Flow, …, to name a few. From a technological perspective, what’s more significant is the abundance of dApp (decentralized application) development platforms provided by many of these blockchains. These dApp platforms built using contemporary programming languages like Go, Rust, Python, are competing among themselves, thus widening choices and expediting improvement that ultimately benefit the rapidly growing dApp development community.

While there are relatively few business cases for building a custom blockchain system, a much greater demand has emerged over the past couple of years for developing smart contract applications particularly in industries such as supply chain, DeFi, collectibles, arts, gaming and metaverse. Many blockchain platforms provide programming SDKs (software development kits) for popular languages like JavaScript, Python, or DSLs (domain specific languages) such as Solidity that many Ethereum dApp developers are already familiar with.

Meanwhile, frameworks for smart contract development that help boost developers’ productivity have also prospered. Within the Ethereum ecosystem, the once predominant Truffle is now competing head to head with other frameworks like Hardhat.

Bitcoin versus Ethereum

Even though Bitcoin remains the blockchain network with the largest market cap, it primarily serves a single purpose as a decentralized cryptocurrency. It wasn’t designed as a platform for development of business/financial applications like many other blockchain platforms were. Hence comparing Bitcoin with, say, Ethereum is like comparing apples to oranges. That said, Bitcoin’s price apparently is still driving the ups and downs of almost every average blockchain network out there.

Despite all the relatively new blockchain development platforms emerged over the past few years, Ethereum remains the distinguished leader with its TVL (total value locked) taking up well over half of the pie comprising all chains. To overcome the known issues of its underlying PoW (Proof of Work) consensus in scalability (and eco-friendliness), resulting in slow transactions and high gas fees, Ethereum is undergoing a major transition to Ethereum 2.0 with a PoS (Proof of Stake) consensus that will supposedly allow it to cope with future growth.

Layer-2 blockchains on top of Ethereum

To circumvent Ethereum’s existing scalability problem, various kinds of off-chain solutions have been put in place. They are oftentimes broadly referred to as layer-2 blockchain solutions, supplementing the underlying layer-1 blockchain (in this case Ethereum). The common goal of the layer-2 solutions is to alleviate loads from the main chain (i.e. Ethereum) by delegating the bulk of compute-intensive tasks to auxiliary chains with more efficient way of handling those tasks.

Here’s a quick rundown of the most common types of layer-2 blockchain solutions:

Rollup – a kind of the off-chain solutions that executes transactions in rolled-up batches outside of the main chain while keeping transaction data and proof mechanism on the chain. A zero-knowledge (ZK) rollup performs validity proof whereas an optimistic rollup (e.g. Optimism) assumes transactions are valid and runs fraud proof upon challenge calls. e.g. Loopring is a ZK rollup and Optimism is an optimistic rollup.

State Channel – another kind of solutions that allows its participants to bypass node validation process on the main chain by locking certain portion of the state via a multi-signature smart contract, perform transactions off-chain and unlock the state with appended state changes back to the main chain. Examples of state channel operators are Raiden, Connext.

Plasma – a “nested” blockchain with its own separate security from the main chain that performs basic transactions and relies on fraud proof upon validity challenge. e.g. OMG Plasma Project.

Sidechain – a relatively more independent off-chain setup with its own security, consensus mechanism and block structure. e.g. Polygon is a popular layer-2 blockchain of this category.

For more details, visit Ethereum’s developer site re: off-chain scaling.

Other layer-1 blockchains

Meanwhile, a number of layer-1 blockchains such as Avalanche, Solana, Algorand, have been steadily growing their market share (in terms of TVL). Many of these blockchains were built using leading-edge tech stacks like Rust, Go, Haskell, with improved architectures and more efficient, scalable eco-friendly consensus mechanisms. By offering the dApp development community cutting-edge technology and versatile tools/SDKs, these blockchain operators strategically grow their market share in the highly competitive space.

While “Ethereum killers” sounds like a baiting term, it’s indeed possible for one or more of these blockchains to dethrone Ethereum before its v2.0 has a chance to succeed the underperforming v1.0 in mid/late 2022. With things evolving at a cut-throat pace in the blockchain world and Ethereum’s upgrade taking considerable time, wouldn’t it be logical to expect that one of the newer blockchains with improved design would swiftly take over as the leader? Evidently, Ethereum’s huge lead in market share (again, in terms of TVL) and early adopters buy-in has helped secure its leader position. Perhaps more importantly is the inherent limitations imposed on any given blockchain that improvement can’t be made simultaneously in all aspects.

Trilemma vs CAP theorem

Somewhat analogous to the CAP theorem (consistency/availability/partition tolerance) for distributed systems, the blockchain trilemma claims that security, scalability and decentralization cannot be simultaneously maximized without certain trade-off among them. For distributed systems, a decent degree of partition tolerance is a must. Thus they generally trade consistency for availability (e.g. Cassandra) or vice versa (e.g. HBase).

On the other hand, a blockchain by design should be highly decentralized. But it also must be highly secured, or else immutability of the stored transactions can’t be guaranteed. For a given blockchain, there is much less room for trade-off given that security and decentralization are integrally critical, in a way leaving scalability the de facto sacrificial lamb.

This is where the trilemma differs from CAP. Under the well formulated CAP theorem, suitable trade-off among the key requirements can result in a practical distributed system. For instance, Cassandra defers consistency for better availability and remains a widely adopted distributed storage system.

Given the axiomatic importance of security and decentralization in a blockchain, developers essentially have to forgo the trade-off approach and think outside the box on boosting scalability. Sharding helps address the issue to some extent. Some contemporary blockchains (e.g. Avalanche) boost up scalability and operational efficiency by splitting governance, exchange and smart contract development into separate inter-related chains each with optimal consensus algorithm. Then there are always the various intermediary off-chain (layer-2) solutions as described earlier.

What about layer-0?

While a layer-1 blockchain allows developers to create and run platform-specific dApps/smart contracts, a layer-0 blockchain network is one on which blockchain operators build independent blockchains with full sovereignty. To build a custom blockchain, developers may elect to repurpose from an existing open-source layer-1 blockchain which consists of specific features of interest. When high autonomy and custom features (e.g. custom security mechanism) are required, it might make more sense to build it off a layer-0 network which provides an inter-network “backbone” with an underlying consensus algorithm, standard communication protocols among blockchains and SDKs with comprehensive features.

One of the popular layer-0 networks is Cosmos which some high-profile blockchains like Binance Chain were built on top of. Another layer-0 network is Polkadot that offers a “centralized” security model, contrary to Cosmos’ leaving the responsibility of security setup to individual blockchain operators. For core feature comparisons between the two networks, here’s a nice blog post.

Blockchain oracles

Then there are blockchain projects whose main role is to connect a blockchain with data sources from the outside world. A blockchain can be viewed as an autonomous ecosystem operating in an isolated environment with its own governance model. Such isolation is by-design, disallowing on-chain smart contracts to arbitrarily reference external data like currency rates, IoT sensor data, that can be prone to fraud.

An oracle provide a “gateway” for the smart contracts on a blockchain to connect to off-chain data sources in the real world. To ensure trustlessness, decentralized oracles emerge to follow the very principle embraced by general-purpose blockchains. Examples of such oracles are Chainlink and Band Protocol.

NFT – provenance of authenticity

NFT, short for non-fungible token, has taken the world by storm. It’s riding on the trend of blockchain in its early stage when a majority of the general public are still wondering what to make of the phenomenon. At present, the most popular use case of NFT is probably in provenance of authenticity. By programmatically binding a given asset (e.g. a painting) to a unique digital token consisting of pointers to unchangeable associated transactions (e.g. transfers of ownership) on a blockchain, the NFT essentially represents the digital receipt of the asset.

A majority of the NFTs seen today are associated with digital assets such as digital arts. A similar provenance mechanism can also be extended to cover physical assets like collectible arts by having the corresponding NFTs referencing immutable “digital specs” of the physical items. The “digital specs” of a given physical item could be a combination of the unique ID of the engraved tag, detailed imagery, etc.

Given the prominence of Ethereum, most NFTs follow its standards such as ERC-721 standard which requires a “smart contract” that programmatically describes the key attributes of the token and implements how the token can be transferred among accounts. Once a smart contract is deployed on a blockchain, it cannot be changed. Nor can any results from executing the contract that are stored in validated blocks.

Outside of the Ethereum arena, some blockchain projects come up with their own native NFT standards. For example, Algorand’s NFT is treated as one of it’s own built-in asset types and can be created by parametrically specifying certain attributes in the metadata of the digital asset without the need of an explicit smart contract. There are also blockchains like Avalanche providing both their native NFTs as well as Ethereum-compatible ones.

Final Thoughts

Over the years, the various emerged blockchains have interwoven into an inter-network that is increasingly more structured and functionally rich. The blockchain-powered inter-network is being touted by many early players as the next generation of the internet and is sometimes referred to as Web3. Layer-0 blockchain projects aim exactly to be an inter-network of independent blockchains. Among other blockchain projects, some aim to create a blockchain-powered internet extension (e.g. Internet Computer).

From a technological point of view, there are definitely merits of using blockchain’s underlying technology. In particular, the trustless decentralized ledger on a blockchain that keeps an immutable log of transactions can be used in many business use cases in various industry sectors like asset management. Some real-world applications using permissioned blockchains have demonstrated success in, for instance, improving traceability and transparency in the supply chain industry. The permission and proof of identity requirement does make fraud attempts significantly harder. Nonetheless, that inevitably breaks trustlessness, although such requirement is generally acceptable in operating a private alliance network.

Viewing from a different angle, cryptocurrencies except for stablecoins like Tether are volatile and will likely be so in the foreseeable future. Given that most prominent public blockchains are operated in conjunction with a corresponding cryptocurrency, when evaluating for a blockchain platform to land on, it warrants a good look at its cryptocurrency counterpart. Even though volatility may not be as critical for the purpose of development as for investment, it does make assessment of a given blockchain’s long-term prospect non-trivial.

Another obstacle to mainstream adoption of public blockchains is that many blockchain projects have emerged with superficial or even downright fraudulent plans for opportunistic reward in the prospering space. And the NFT frenzy permeated with scams also hasn’t helped gaining public trust either. In addition, people are overwhelmed by the numerous blockchain projects out there. As of this post, there are thousands of public blockchain projects, over 80 of which each with its corresponding cryptocurrency market cap above $1 billion. It’s likely only a small percentage of them will prevail when the dust settles.

All those issues are in some way hindering blockchain technology from becoming a lasting mainstream computing class. On the other hand, for those who are adventurous and determined to make the most out of the yet-to-be-mature but improving computing technology, it may be the right time now to dive in.